Create a Better Sharing UI template
Selecting the "Add UI Template" option from the top of the page.

There are 4 tabs in UI Template creation – Main, Social Networks, Referral Link, and Email.
Main
- Style
Start with choosing 1 of the 2 available styles (“Compact” or “Inline”) under the Main tab to determine the overall look of your sharing interface. The UI is set to display the “Inline” style as default.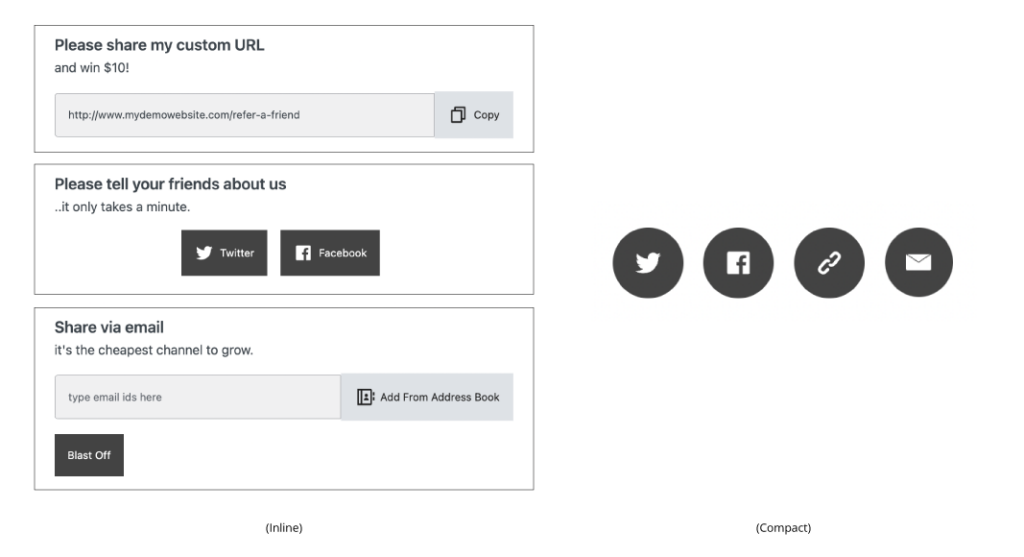
- URL to share
Select a destination page for your referral link – which can either be the page the plugin is embedded on or any page of your choice. - Preview
Provides a live view of your current sharing UI.
You can choose the order of your sharing channels* using the ‘Move Up’ and Move Down’ buttons on the right end of the UI preview. You can also click ‘Customize’* to jump into the dedicated menu tabs of each sharing channel for additional settings.
*Note: Actionable buttons to change the order of the sharing channels (“Move Up/Move Down”) or to jump (“Customize”) to additional settings are only available for the “Inline” style UI.
Social Networks
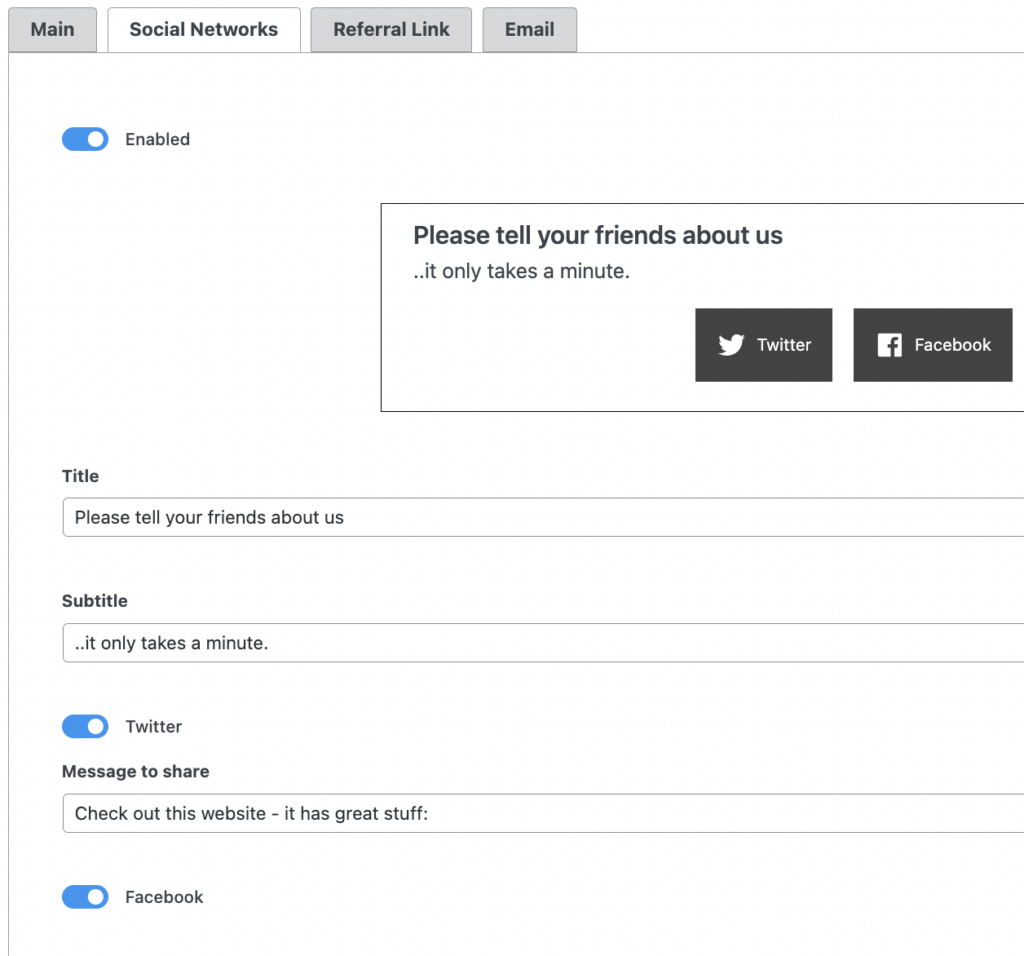
- Toggle
Enable/Disable the option to share via social media. - Title/Subtitle*
Change the text for the Header and Sub-Header with a message of your choice. Motivate users to share or use the space to add some brand personality to your interface. - Placeholder Text
Change the text for the placeholder. Give users a headstart to create their own messages. - Message
Preload a sharing message for the platforms that allow it.
*Note: Options to change the Title/Subtitle on the page is only available for the “Inline” style UI.
Referral Link
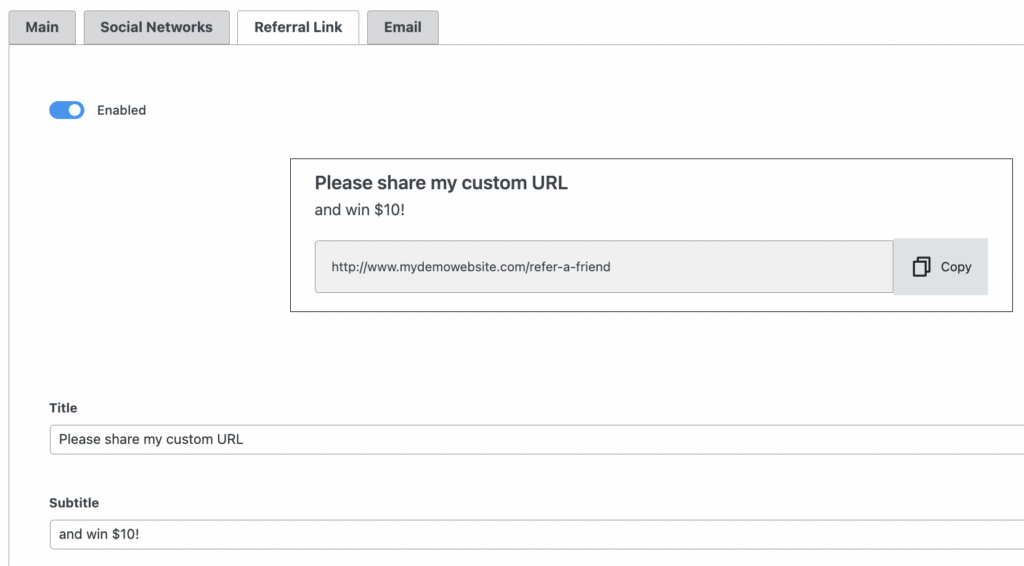
- Toggle
Enable/Disable the option to quickly copy and share a referral link. - Title/Subtitle*
Change the text for the Header and Sub-Header with a message of your choice. Motivate users to share or use the space to define your reward proposition.
*Note: Options to change the Title/Subtitle on the page is only available for the “Inline” style UI.
Email
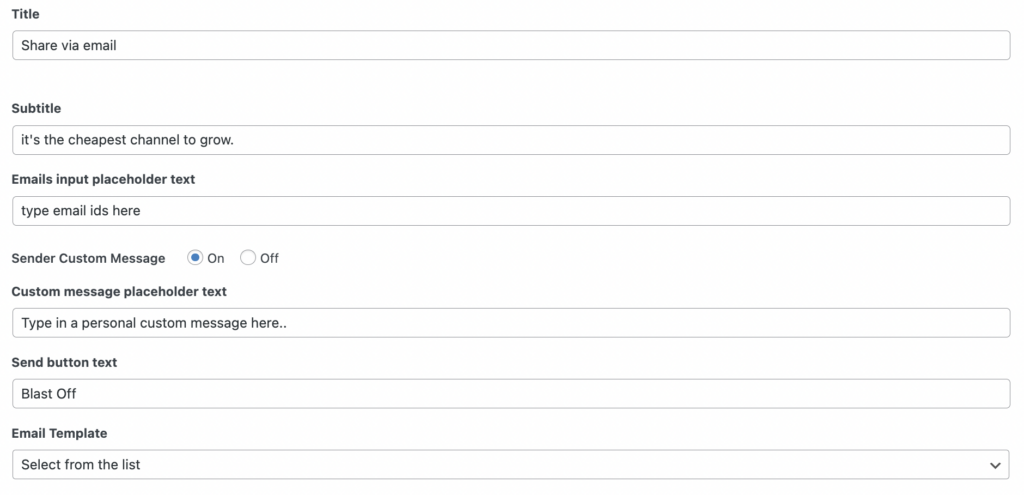
- Toggle
Enable/Disable the option to share via email. - Title/Subtitle
Change the text for the Header and Sub-Header with a message of your choice. Motivate users to share or use the space to define your reward proposition. - Button Text
Change the text for the CTA button. - Placeholder Email Text
Change the text for the placeholder. Give users a headstart to create their own messages. - Email Template
Choose any 1 of your predefined email templates to use for this specific UI template.
—
To enable the "Add from Address Book" button. This setting is located under the "Contact Picker" section of Better Sharing Plugin Settings in the WP Sidebar menu.
Once the personalization of the template has been completed, name the UI Template and click "Publish" on the right side to save the template for deployment.
Related Articles
Create a Better Sharing template, email template, and customize the UI
1. To insert your UI template on any page – add our Gutenberg block or shortcode If you’re using an AddOn other than the IgnitionDeck AddOn, you don’t need a UI template. For the IgnitionDeck AddOn UI template, see UI Template for IgnitionDeck 2. ...Troubleshooting Better Sharing
Sharing Modal will not open (or close) This is most likely a Javascript issue either due to Javascript not being enabled in the browser or a conflict with another element on the page. Try a different browser, or temporarily switch themes / disable ...Translating Better Sharing
The Better Sharing block and templates are fully translatable through the combination of the admin UI and the provided language template file (POT). For text strings that appear on the front end templates including placeholder text in fields, these ...Create a Better Sharing email template
Here you can create and save a variety of templates for all your outgoing email needs. The plugin includes an easy accessible list of variables for personalising outgoing emails. These can be used to include custom messages, sender’s name, and ...Adding Better Sharing to webpage
Once installed – You will need to add your Better Sharing UI to a webpage of your choice. This can be achieved in one of two ways: Add Better Sharing from the WordPress Gutenberg Editor. Navigate to WP-admin » Pages (or Posts), Select the page to add ...